What is Embedded Systems?
Embedded system is defined as a way of working, performing or organizing one or many tasks according to a fixed set of rules (or) an arrangement in which all the units assemble and work together according to the program or planEmbedded Systems Basics
Embedding a Micro controller:
The different streams of Micro controllers used in embedded systems are usually among the five streams of families given in the table.
Embedded Systems Applications:
Embedded systems have different applications. A few select applications of embedded systems are smart cards, telecommunications, satellites, missiles, digital consumer electronics, computer networking, etc.
- Motor Control System
- Cruise Control System
- Engine or Body Safety
- Robotics in Assembly Line
- Car Entertainment
- Car multimedia
- Mobile and E-Com Access
Embedded systems in Telecommunications
- Mobile computing
- Networking
- Wireless Communications
Embedded Systems in Smart Cards
- Banking
- Telephone
- Security Systems
Embedded Systems in Missiles and Satellites
- Defense
- Aerospace
- Communication
Embedded Systems in Computer Networking & Peripherals
- Networking Systems
- Image Processing
- Printers
- Networks Cards
- Monitors and Displays
Embedded Systems in Digital Consumer Electronics
- DVDs
- Set top Boxes
- High Definition TVs
- Digital Cameras
*8051 Micro Controller
Pin Diagram:
Pin out Description:
Pins 1-8: Port 1 Each of these pins can be configured as an input or an output.
Pin 9: RS A logic one on this pin disables the micro controller and clears the contents of most registers. In other words, the positive voltage on this pin resets the micro controller. By applying logic zero to this pin, the program starts execution from the beginning.
Pins 10-17: Port 3 Similar to port 1, each of these pins can serve as general input or output. Besides, all of them have alternative functions:
Pin 10: RXD Serial asynchronous communication input or Serial synchronous communication output.
Pin 11: TXD Serial asynchronous communication output or Serial synchronous communication clock output.
Pin 12: INT0 Interrupt 0 input.
Pin 13: INT1 Interrupt 1 input.
Pin 14: T0 Counter 0 clock input.
Pin 15: T1 Counter 1 clock input.
Pin 16: WR Write to external (additional) RAM.
Pin 17: RD Read from external RAM.
Pin 18, 19: X2, X1 Internal oscillator input and output. A quartz crystal which specifies operating frequency is usually connected to these pins. Instead of it, miniature ceramics resonators can also be used for frequency stability. Later versions of micro controllers operate at a frequency of 0 Hz up to over 50 Hz.
Pin 20: GND Ground.
Pin 21-28: Port 2 If there is no intention to use external memory then these port pins are configured as general inputs/outputs. In case external memory is used, the higher address byte, i.e. addresses A8-A15 will appear on this port. Even though memory with capacity of 64Kb is not used, which means that not all eight port bits are used for its addressing, the rest of them are not available as inputs/outputs.
Pin 29: PSEN If external ROM is used for storing program then a logic zero (0) appears on it every time the micro controller reads a byte from memory.
Pin 30: ALE Prior to reading from external memory, the micro controller puts the lower address byte (A0-A7) on P0 and activates the ALE output. After receiving signal from the ALE pin, the external register memorizes the state of P0 and uses it as a memory chip address. Immediately after that, the ALU pin is returned its previous logic state and P0 is now used as a Data Bus. As seen, port data multiplexing is performed by means of only one additional (and cheap) integrated circuit. In other words, this port is used for both data and address transmission.
Pin 31: EA By applying logic zero to this pin, P2 and P3 are used for data and address transmission with no regard to whether there is internal memory or not. It means that even there is a program written to the micro controller, it will not be executed. Instead, the program written to external ROM will be executed. By applying logic one to the EA pin, the micro controller will use both memories, first internal then external (if exists).
Pin 32-39: Port 0 Similar to P2, if external memory is not used, these pins can be used as general inputs/outputs. Otherwise, P0 is configured as address output (A0-A7) when the ALE pin is driven high (1) or as data output (Data Bus) when the ALE pin is driven low (0).
Pin 40: VCC +5V power supply
More details about 8051
http://www.mikroe.com/chapters/view/65/chapter-2-8051-microcontroller-architecture/
Programming For 8051 using C


More details about 8051
http://www.mikroe.com/chapters/view/65/chapter-2-8051-microcontroller-architecture/
Programming For 8051 using C
Using Keil uVision 4
1. Download and Install Keil uVision4
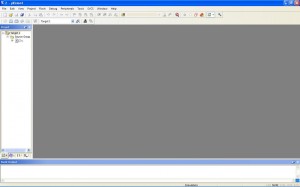
2. Open Keil uVision

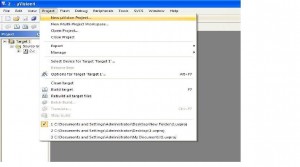
3. Create a new Project : Project >> Create µVision Project

4. Browse for the location
5. Select the microcontroller Atmel>>AT89C51
6. Don’t Add The 8051 startup code
5. Select the microcontroller Atmel>>AT89C51
6. Don’t Add The 8051 startup code
7. File>>New
8. Enter the source code.
9. Save it
10.Add the source code.. Double click on source group1>>Select the file and Add and close it..
11. Then Compile it. Click Project>>Build Target or F7
12. Creat the Hex file to the output
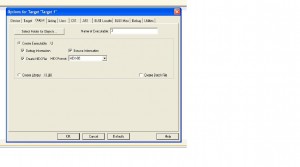
13.Right click on Target1>>options for target “target 1”
In the Output Tab check the “Create HEX file” box<
In the Output Tab check the “Create HEX file” box<


No comments:
Post a Comment